


How to Read a Cross Stitch Pattern: Symbols & Legend Guide
Last updated: 6 May 2026 — by Stitchly Studio
Knowing how to read a cross stitch pattern is the difference between a stitching session that flows and one that ends with three hours of frogging (pulling stitches out). The good news: every counted cross stitch chart, no matter how intimidating it looks, is built from the same four parts. Once you understand them, you can pick up any pattern — a 2,000-stitch sampler or a 60,000-stitch portrait — and start stitching with confidence. This guide walks through every part of a chart and gives you two proven ways to actually work through it.
The short version
- A cross stitch pattern is a grid where each square equals one stitch.
- Symbols (or colored squares) tell you which floss color goes in each square.
- The legend matches each symbol to a color number and color name.
- Solid lines on top of the grid are backstitch — outlines added at the end.
- Always start from the center of the chart and the center of your fabric.
- The two main working methods are "parking" (one needle per color) and "blocks" (one section at a time).
What is a cross stitch pattern?
A cross stitch pattern is a printed or digital chart that maps an image onto a grid. Each square on the grid represents one cross stitch on your fabric. Inside each square is a symbol, a color, or both — telling you which floss to use.
Patterns come in two main flavors. Counted patterns, the standard, give you a chart and blank fabric — you do all the counting. Stamped patterns have the design pre-printed onto the fabric, so you stitch over the marks. Stamped is easier but limits you to whatever the manufacturer offers; counted is more flexible and far more common, especially for anything beyond simple shapes.
If you're brand new to the craft, our complete starter guide covers supplies and your first stitch first. Come back here once you have a pattern in front of you.
The four parts of every chart
Open any cross stitch pattern and you'll find the same four elements:
- The grid. The visual map of your design. Each square equals one stitch on your fabric. Bold lines every 10 squares help you count without losing your place.
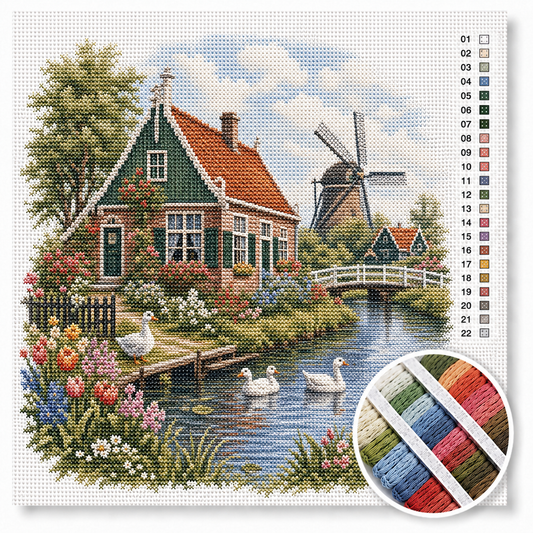
- Symbols (or colored squares). Inside each grid square is a symbol — a heart, a triangle, a letter — or a colored fill. Each unique mark equals one specific floss color.
- The legend (key). Usually on the side or back of the chart. It lists every symbol with the matching Thread color number and color name. Some legends also include strand count and stitch count per color.
- The center markers. Small arrows on the top and side edges. Where the arrows cross is the center of the design. Always start there.
Bonus elements: solid lines drawn on top of the grid (backstitch), little half-symbols (fractional stitches), and dots (French knots). These are optional finishing details added after the cross stitches are done.
Step-by-step: read your first pattern
- Find the center. Look for the small arrows on the chart edges. Mark where they intersect with a pencil dot. Fold your fabric in quarters to find its center too.
- Count the stitches across. Note the chart's width and height in stitches. On 14-count Aida, divide by 14 to get the finished size in inches. A 70 x 70 chart equals exactly 5 x 5 inches.
- Read the legend. Match each symbol to its color number. Pull those skeins from your kit and label them.
- Pick a starting symbol. Begin with whichever color appears closest to the center. Stitch every square showing that symbol within a small area before moving on.
- Count carefully. Use the bold every-10 lines as anchors. Many stitchers cross out finished sections in pencil to keep their place.
The Aida cloth count of your fabric also affects how many strands of floss you'll use — always check the legend for that detail too.
Two working techniques: parking vs blocks
There are two main ways to work through a chart. Both are correct.
The blocks method
Pick a 10 x 10 section. Stitch every color in that block until it's complete. Move to the next 10 x 10 block. Repeat. This is the easiest method to learn and the easiest one to put down and pick up later, because each block is self-contained. Best for beginners and for patterns under 10,000 stitches.
The parking method
Thread one needle per color. When you stitch a few squares of color A and then need to switch to color B, you don't cut the floss — you "park" needle A on a clean spot of fabric, pick up needle B, and stitch with that. This saves an enormous amount of starting and ending time on patterns with hundreds of color changes per row, like photo-realistic portraits.
Most stitchers use blocks for small projects and parking for anything large. Try both — you'll know within an hour which one suits how your brain works.
4 common pattern-reading mistakes
- Starting from a corner. One miscount and you've run out of fabric. Always start from the center.
- Confusing similar symbols. A circle and a dot can look identical when you're tired. Print a fresh legend and keep it next to the chart.
- Skipping the symbol shape. Color-only charts feel friendly but two adjacent shades of pink are easy to swap. If your chart has both color and symbol, trust the symbol.
- Ignoring the bold every-10 lines. Those bold gridlines exist to help you count. Use them as anchors, count from one bold line to the next — don't count from the edge of the chart every time.
Pro tip: print on A3 (or 11 x 17)
If you're working from a digital pattern, print it as large as your printer allows. A3 (or US tabloid, 11 x 17 inches) is the sweet spot — each grid square is large enough to see the symbol without squinting, and you can write notes in the margin. For very large patterns, print across multiple pages and tape them together.
Use a highlighter to cross out completed sections, or photocopy the chart so you can scribble on the copy without ruining the original. Many stitchers also slide the chart into a clear plastic sleeve and check off rows with a dry-erase marker.
Frequently asked questions about reading cross stitch patterns
What's the difference between counted and stamped patterns?
Counted patterns come as a chart on paper plus blank fabric — you count squares to place each stitch. Stamped patterns have the design pre-printed on the fabric. Counted patterns are more common, support far more designs, and produce cleaner finished pieces.
What do half symbols or triangles mean?
Triangles or half-filled squares mark fractional stitches — quarter, half, or three-quarter stitches. They're used for curves and detail. Beginners can skip patterns with fractional stitches; the result still looks great with full crosses only.
My pattern uses colors instead of symbols. Is that different?
No, it works the same way. Each color block equals one embroidery thread shade. The legend tells you which shade. Be careful with similar colors — two pinks can look identical under indoor light. If possible, choose a chart with both color and symbol.
Can I print a digital pattern at home?
Yes, most digital patterns are PDF files designed for home printing. Print on A4 or US Letter for small designs, A3 or US tabloid for larger ones. Print one extra copy as a working draft you can mark up.
Should I cross out completed sections?
Yes — it's the single best habit for keeping your place. Use a highlighter or pencil on a photocopy of the chart, never the original. Cross out one square at a time as you stitch, or cross out 10 x 10 blocks as you finish each one.
Ready to start stitching?
Open your chart, find the center arrows, mark them, and begin. If you'd like a chart that's already simplified for you, our custom photo cross stitch kit ships with a clean, large-format pattern, full embroidery thread legend, and pre-counted floss — the conversion is done for you. For more on the basics, see our cross stitch starter guide or learn how counts affect detail in our Aida cloth count guide.